
Connection to Snowflake
To connect Snowflake as a data source in the DQC Platform, you’ll need to provide login credentials (either password or key pair), account details, and database-specific configuration. This guide walks you through the connection setup and best practices.
Add a Snowflake connector
To begin:
Navigate to the Data Connectors screen
Click the Snowflake button
Fill in the required fields as described below
 Start the integration by selecting Snowflake from the list
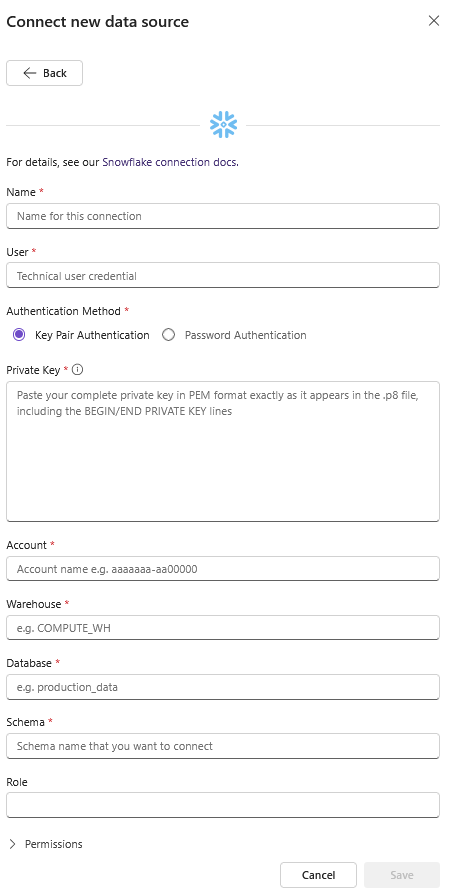
Required connection information
Field | Example | Description |
|---|---|---|
Name |
| Custom label for this connection |
User |
| A Snowflake user with read access |
Key Pair |
| (Recommended) Unencrypted RSA key in PEM format (see below) |
Password |
| Optional alternative to key pair authentication |
Account |
| Typically found in the URL: |
Warehouse |
| The warehouse to execute queries |
Database |
| Target database containing relevant schemas |
Schema |
| Schema with the tables to be quality checked |
Role |
| Role that defines access scope |
Recommended setup: Dedicated Snowflake service account
Create a new service account
Go to Account > Users
Click Create and define a technical user for DQC
Optionally assign a warehouse under “Advanced”
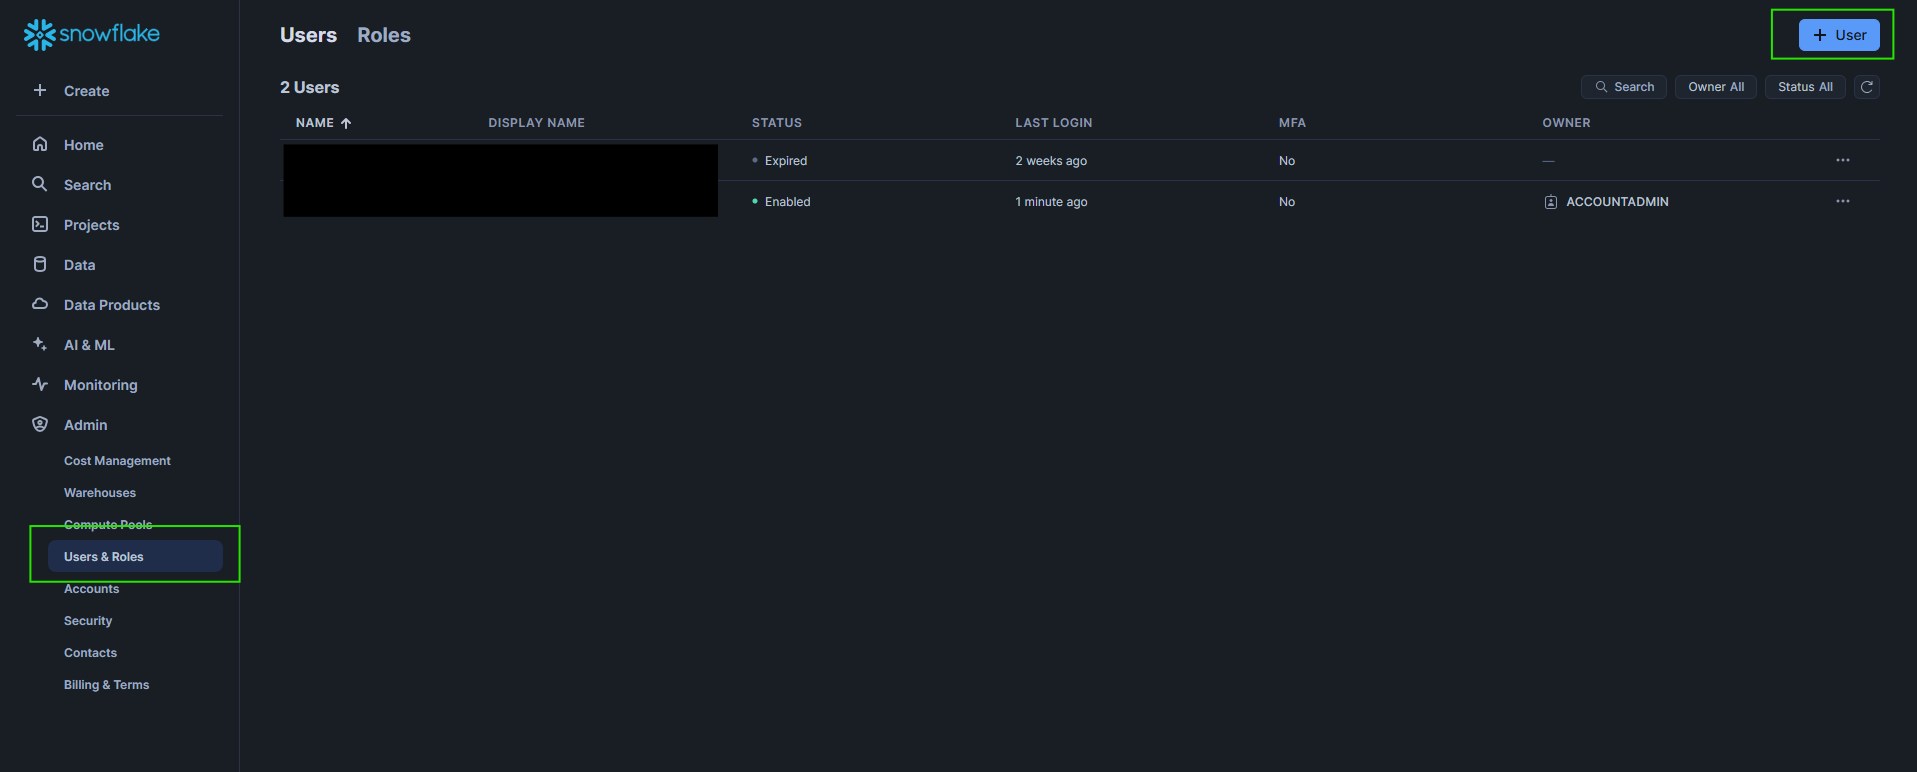 Use a separate technical user for better auditing and security
Create a custom role & grant access
Go to Roles > Create Role
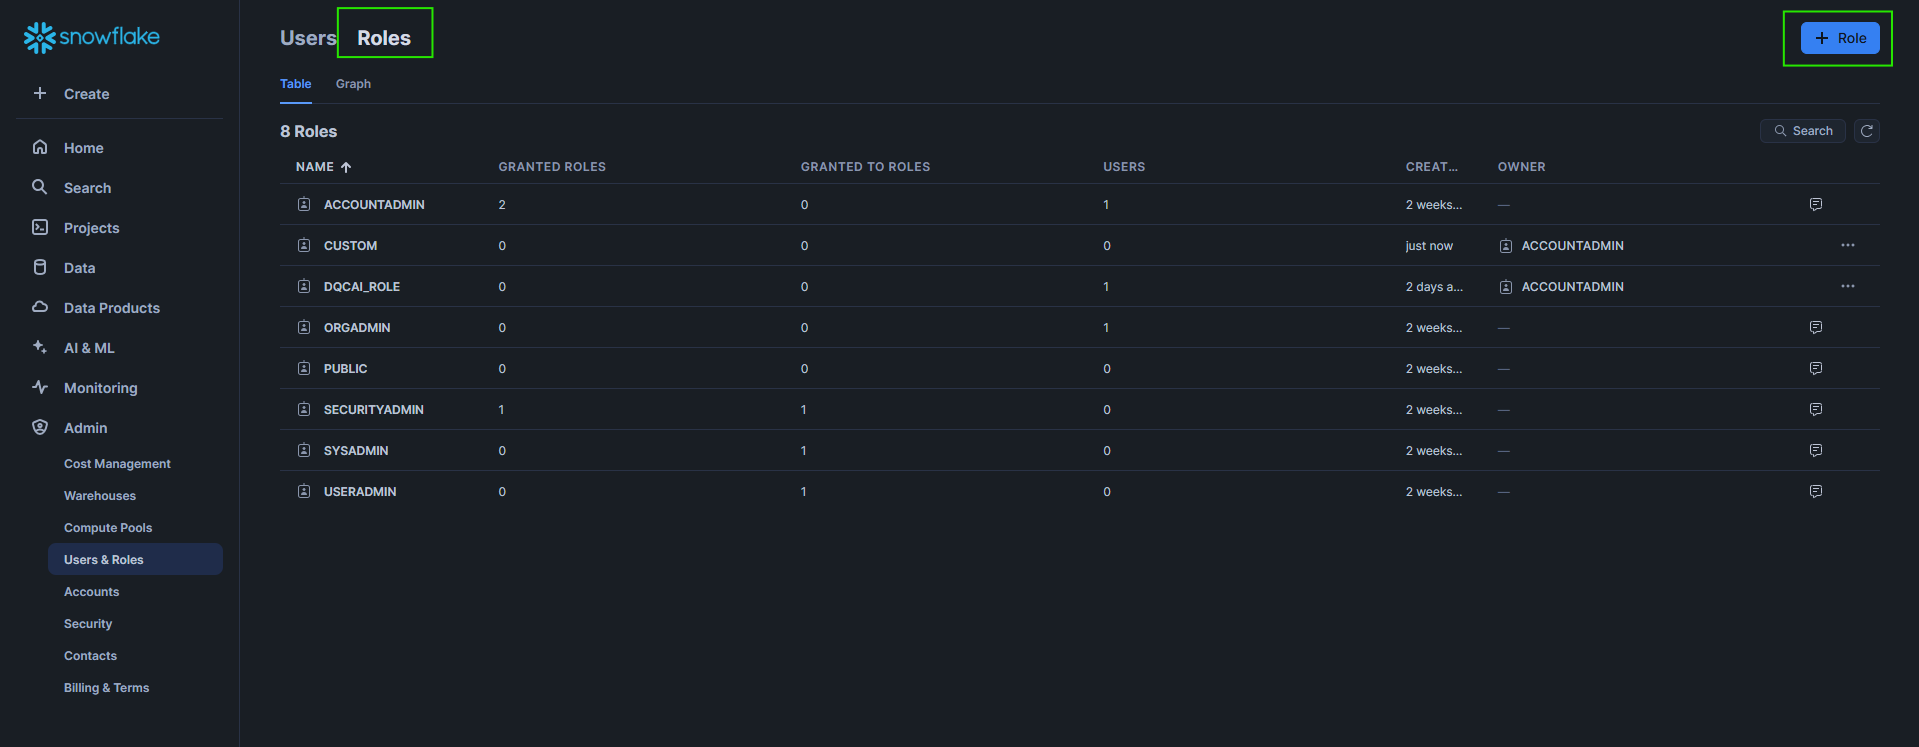
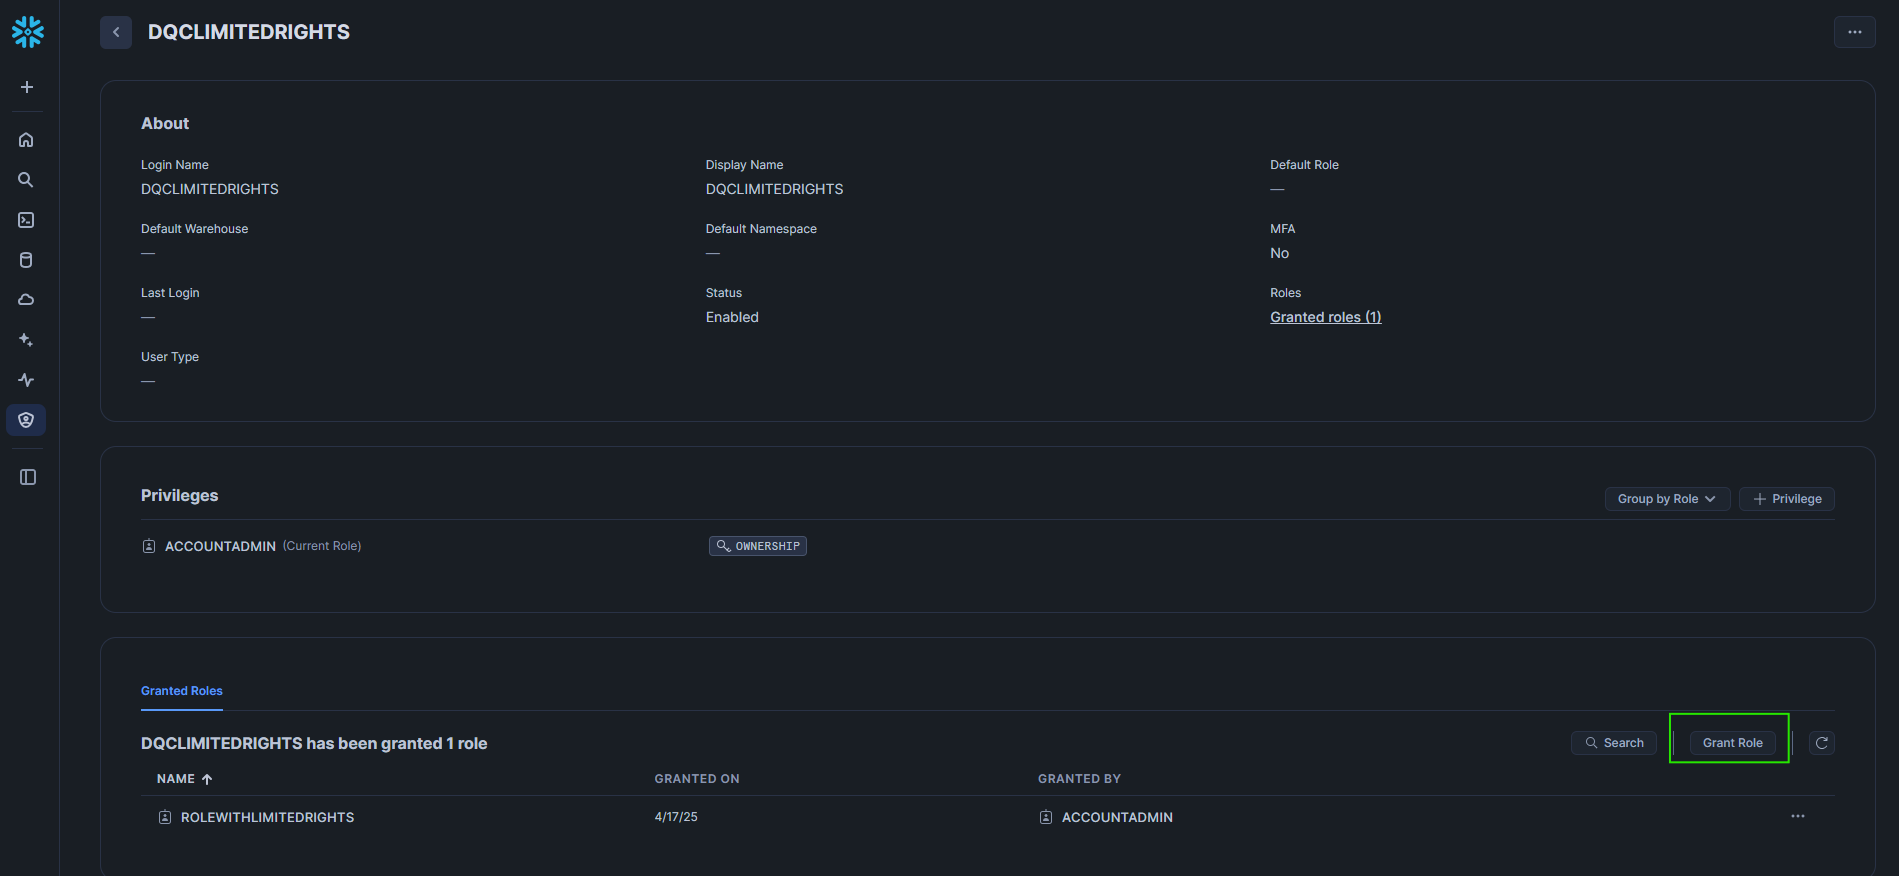
2.Grant the new role to the service account
3.In the left pane, select the target schema
4.Click Privileges and assign the following:
USAGESELECT(future tables)SELECT(future views)
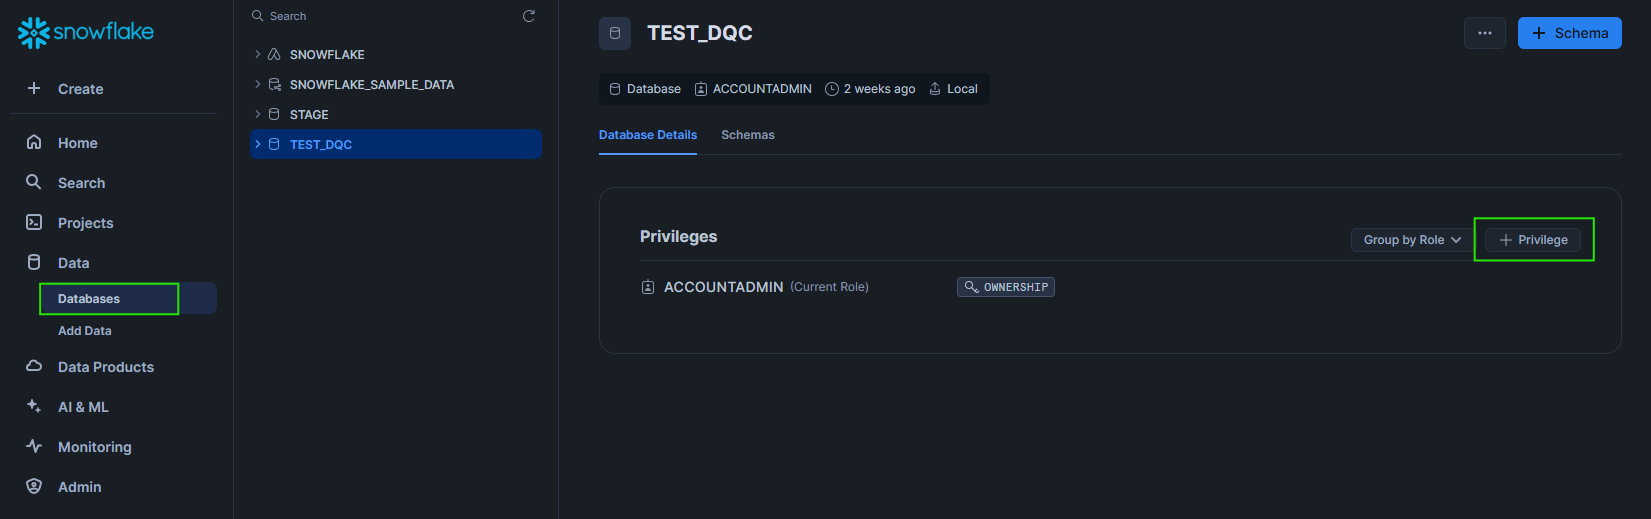 Snowflake does not inherit privileges from database to schema — set both explicitly
Create and use a key pair (preferred)
Available with DQC Platform version 2.28.6 and above
Step 1: Generate private key
Run this in your terminal:
openssl genrsa 2048 | openssl pkcs8 -topk8 -inform PEM -out rsa_key.p8 -nocryptThis generates the required private key
-----BEGIN PRIVATE KEY-----
MIIE6T...
-----END PRIVATE KEY-----
The private key is in file rsa_key.p8 open or print the file:
cat rsa_key.p8Step 2: Generate public key and assign in Snowflake
Generate the public key:
openssl rsa -in rsa_key.p8 -pubout -out rsa_key.pub
cat rsa_key.pub
Assign it to the user in Snowflake:
ALTER USER example_user SET RSA_PUBLIC_KEY='MIIBIjANBgkqh...';You can now use the private key to connect the Snowflake user to the DQC Platform. Make sure to use the right format for the private key field like this:
-----BEGIN PRIVATE KEY-----
MIIE6T...
-----END PRIVATE KEY-----
Note: Omit
-----BEGIN PUBLIC KEY-----and-----END PUBLIC KEY-----in SQL.
Only account owners or users with theSECURITYADMINrole can modify users.
Whitelist the DQC Platform IP address
To allow Snowflake to accept connections from the DQC Platform, whitelist the following static IP:
3.123.94.228 Notes
Notes
We strongly recommend using key pair authentication for production use
Password authentication remains available as a fallback
Learn more: Supported data sources, Connection to Azure SQL, Connection to PostgresSQL