
Adding a new tenant and users to the DQC Platform
For improved access control and data separation, we recommend creating a dedicated tenant per data domain or business function within the DQC Platform. This ensures data is only accessible to relevant users and is fully isolated from other teams or departments.
Why use separate tenants?
Full data isolation across teams or regions
Simplified user and permission management
Better control over sensitive datasets
Only users assigned to a tenant can view its data and connectors
Step-by-step: Create a new tenant and invite users
(Optional) Step 1: Remove user from an existing tenant
If a user is still assigned to another tenant and you want to start fresh:
Go to Settings > Profile
Click on Delete Account
Confirm the deletion
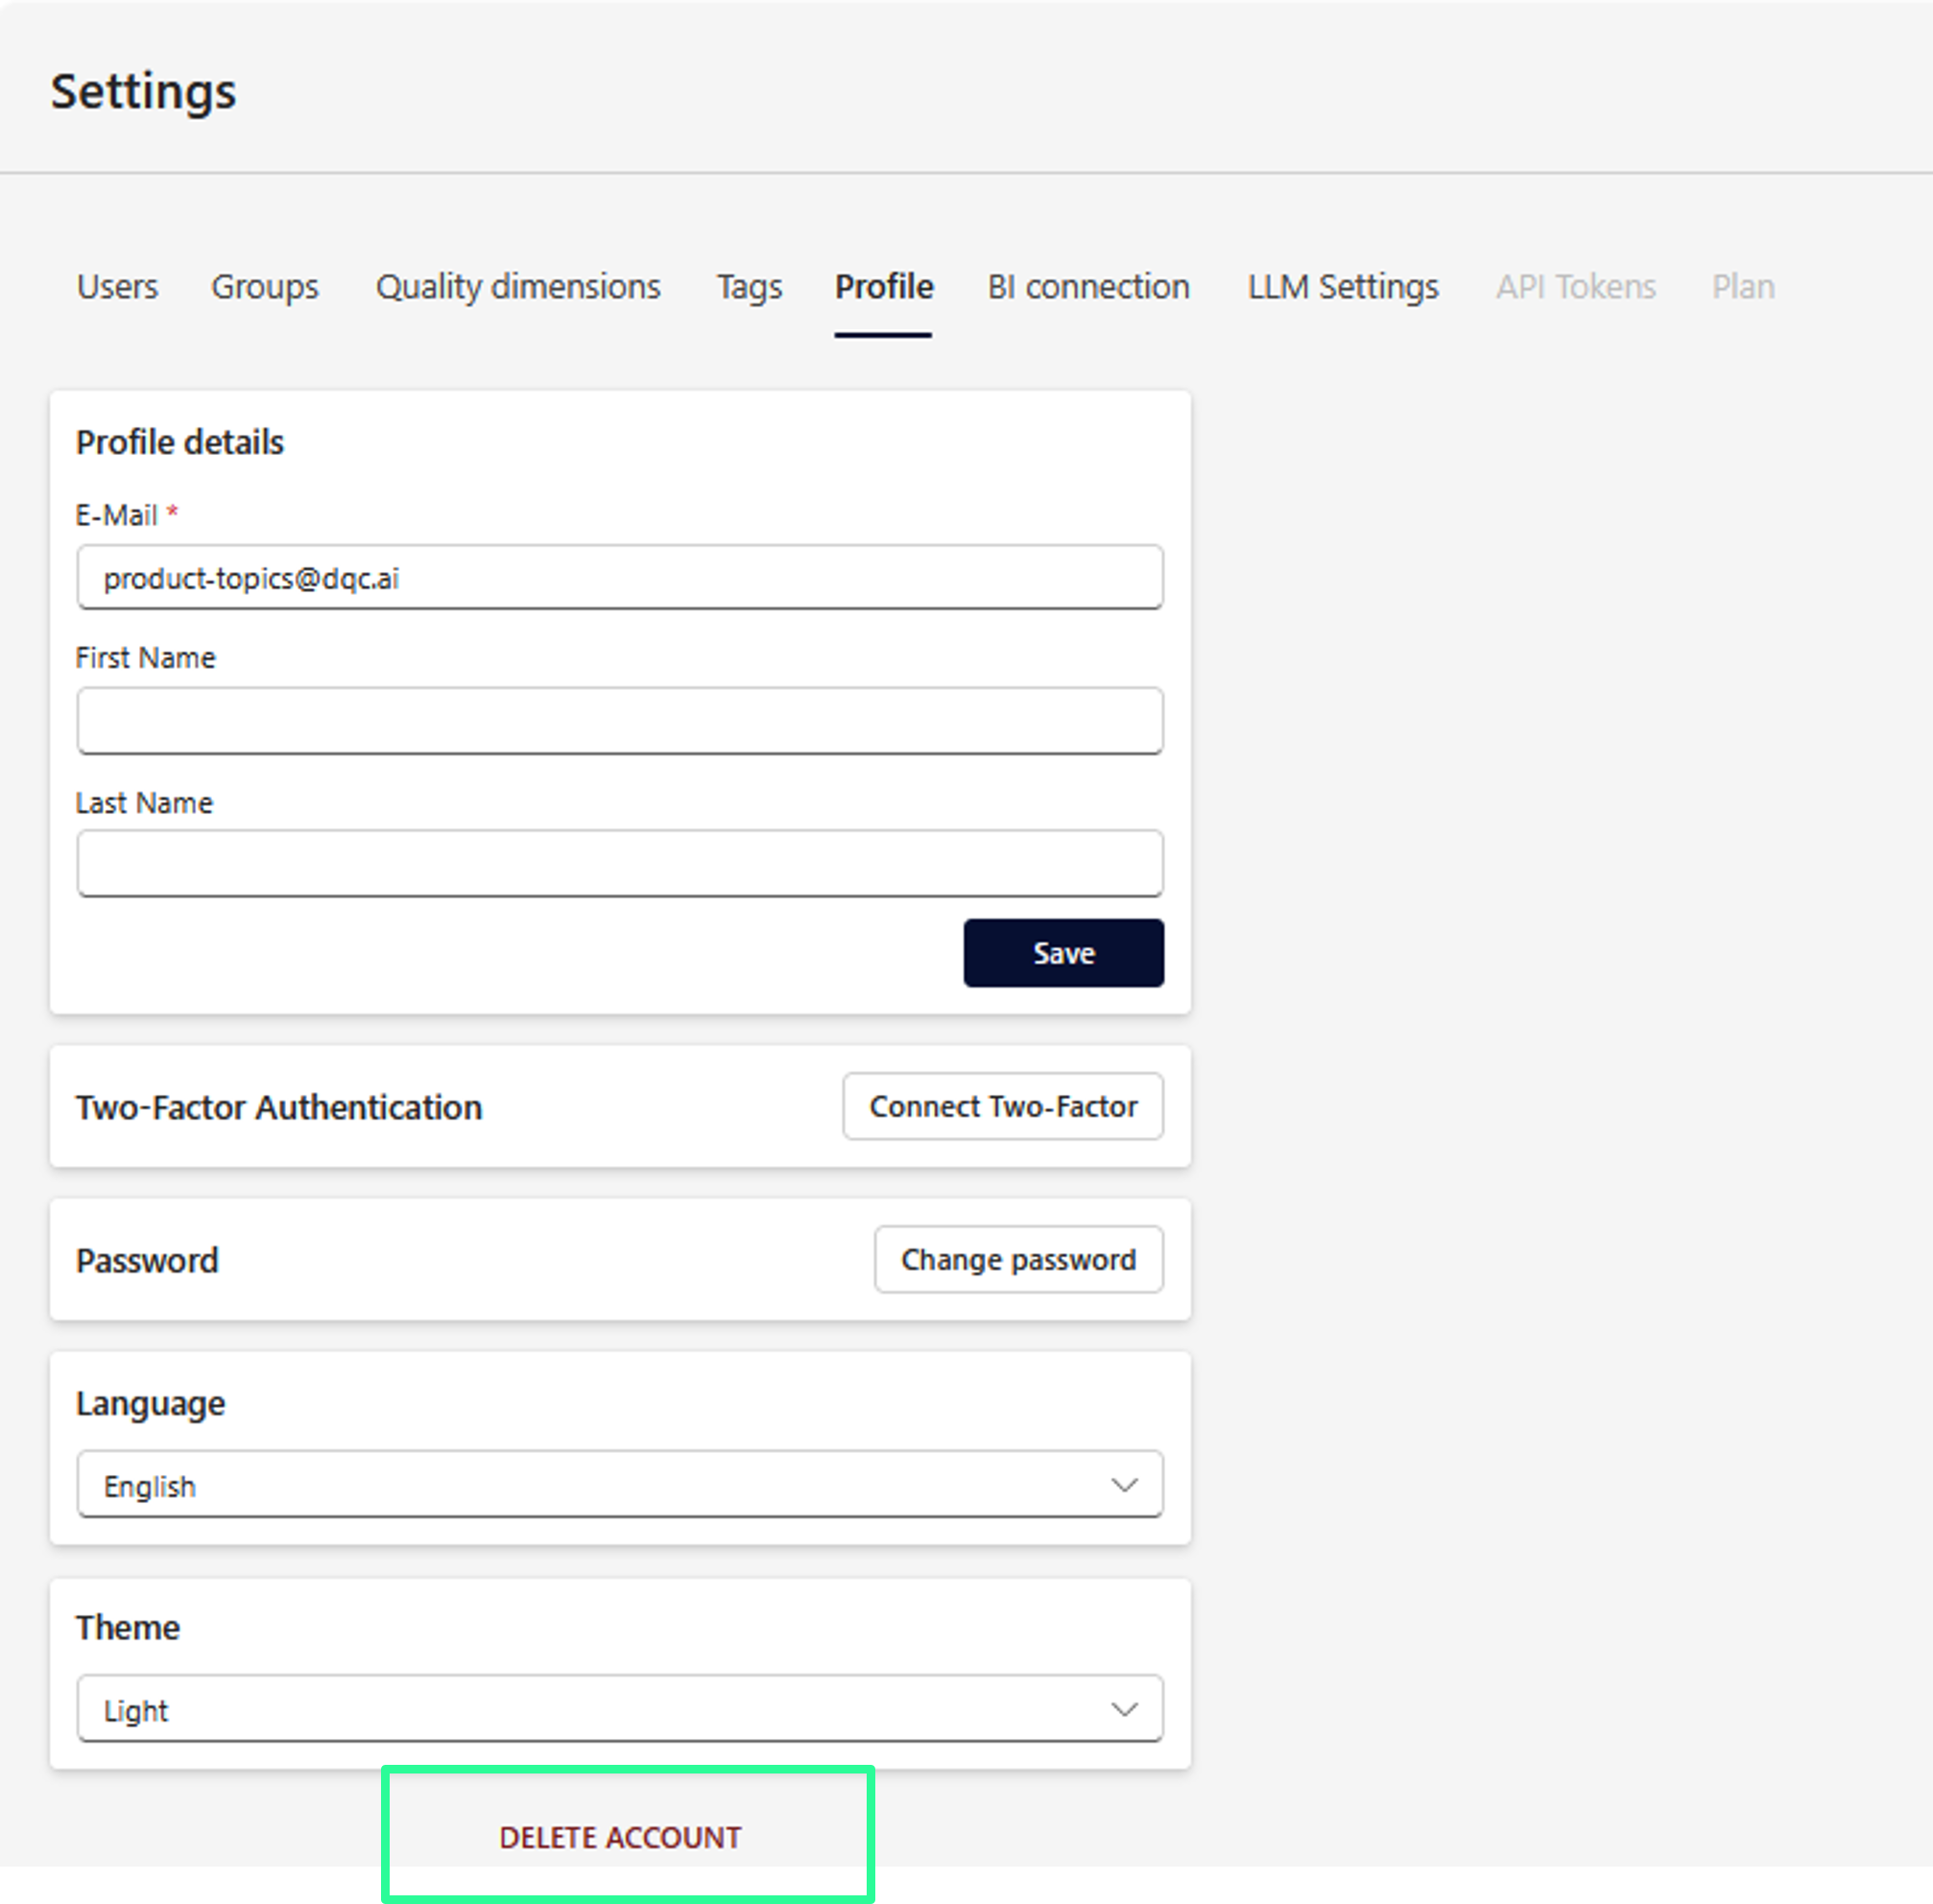 This step is only necessary if the user must be moved from a different tenant
Step 2: Create a new tenant
Once the previous account is deleted (or if no tenant exists yet), logging into the DQC Platform again will automatically create a new, isolated tenant.
Step 3: Invite team members to the new tenant
To collaborate with others:
Navigate to Settings > Invite User
Enter the email addresses of your team members
Send the invitations
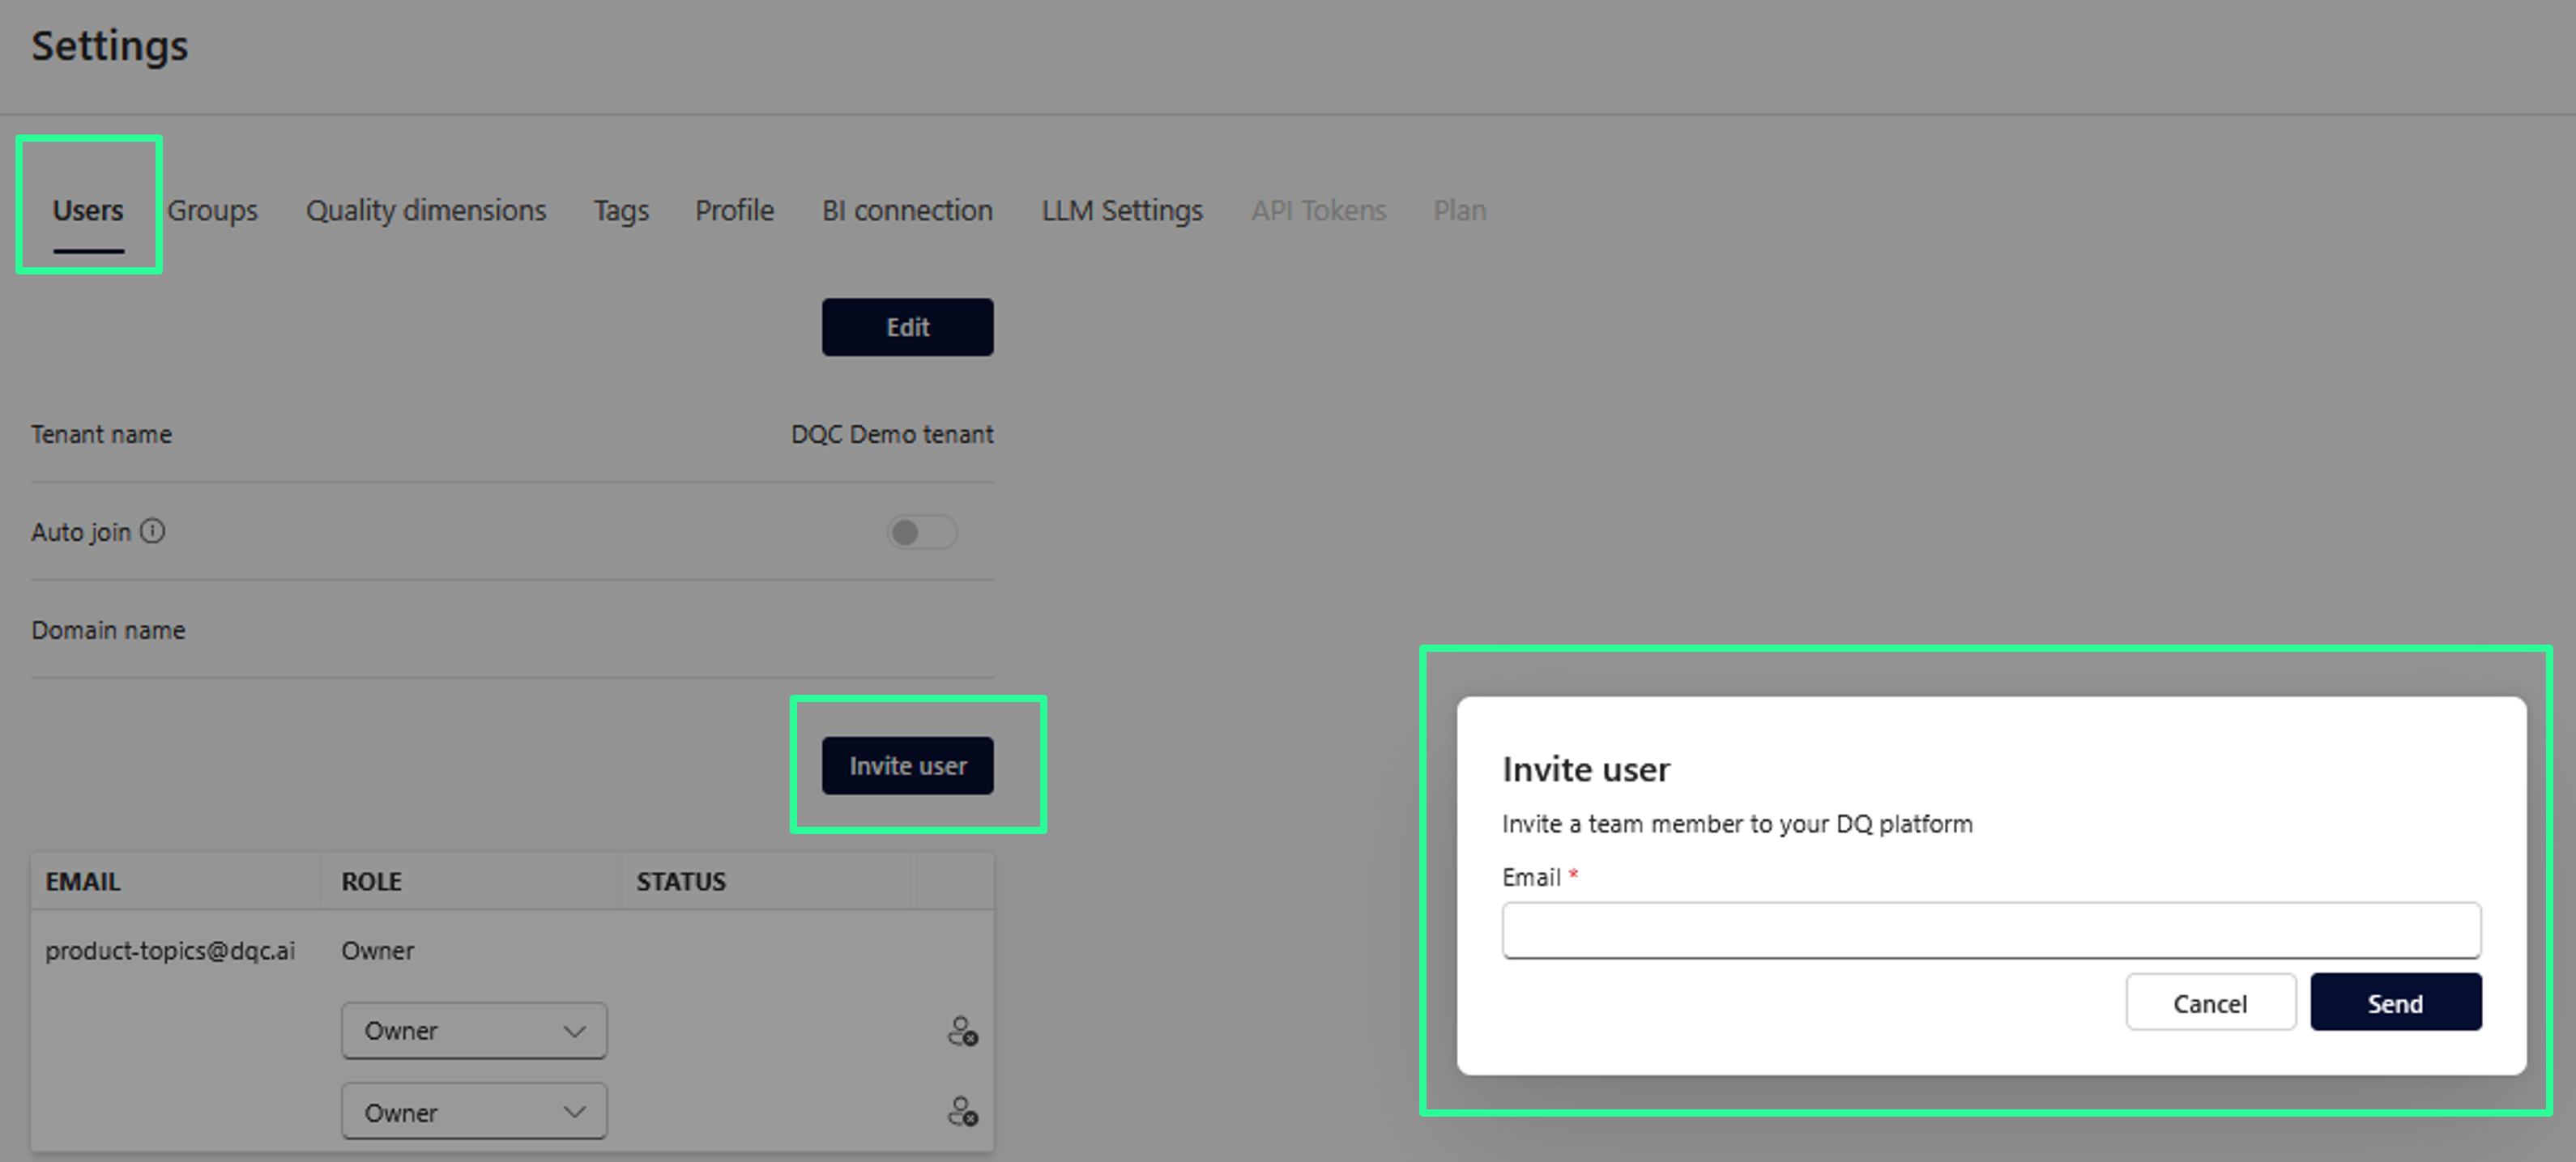 Invite colleagues to your new tenant with just a few clicks
Step 4: Accept the invitation
Invited users will receive a notification with a popup inside the DQC Platform to accept the tenant invitation.
 Users can join the tenant directly from the DQC Platform UI
If the user is not yet registered for the DQC Platform, he will receive an email for registration.
Access scope and security
Data sources, rules, tables, and connectors are fully isolated within each tenant
Users in one tenant cannot see or access data from other tenants
This setup ensures that permissions and visibility remain scoped to the right group
 Notes
Notes
A single user can only belong to one tenant at a time
If you need cross-tenant access or multi-tenancy scenarios, please contact support
Learn more: User roles and permissions, Connectors screen